 Home
Home

 Artists
 Search
 Recent
 Random
 Posts
Posts
 DMs
DMs
 Tags
Tags
 Random
 Importer
 Import
 FAQ
FAQ
 Account
 Register
 Favorites
 Login
Login

How To Make Your Own NormalNavi! (Patreon)
Downloads
Content

What you will need:
- Blender
- A 2D art program with layer support (Paint.NET is free)
- Limitless imagination
- A 3-button mouse
- The attached zip contains:
- A 3D model
- A texture
- A UV map
Intro
So, you know these guys?

Yeah, NormalNavis. I'm going to use NormalNavis in this post for two things, 1) To teach you how to recolor, read and edit texture maps for 3D models and 2) For you to have something to try all this on!
We'll be following 5 steps during this tutorial:
- Open a 3D model in Blender
- Understand the UV map
- Open the texture and UV map in a 2D art program
- Edit the texture map
- Share your masterpiece
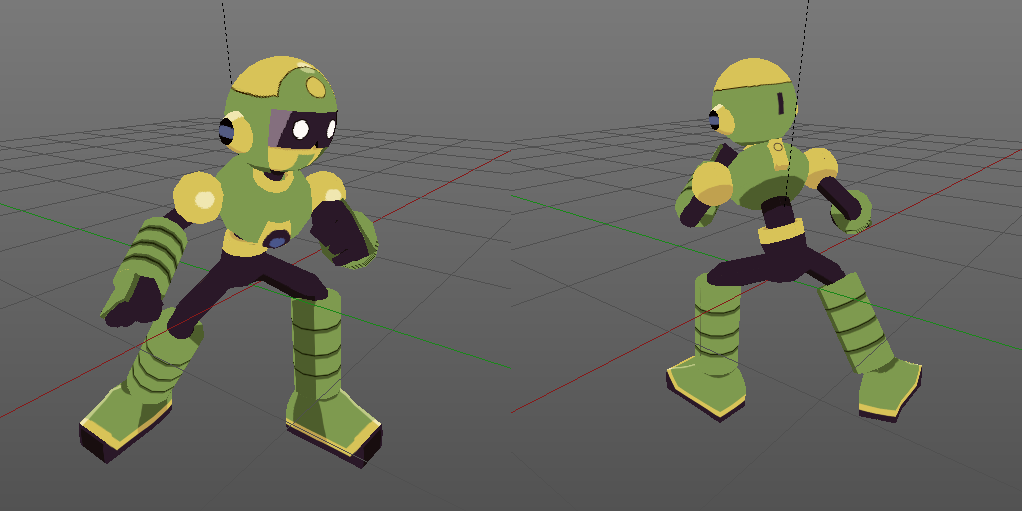
Exhibit A: Normie
This is the default NormalNavi we all know and love (and that I modeled, thanks to the contributions to the tip jar by the community).
And this...

...is the texture (and UV map).
After unwrapping a modeler might paint over these parts (while looking at what they correspond to) to create the texture for a low poly model! And that's exactly what we're going to do.
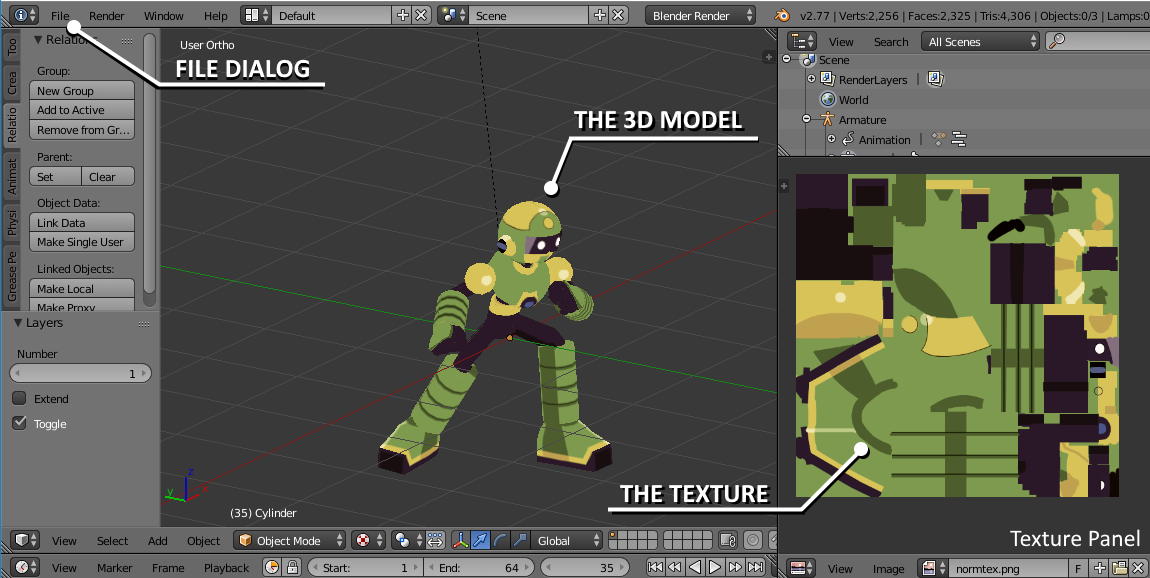
Step One: Opening the Model
Now open up Blender and let's load up the model (File > Open > NormalNavi.blend) .
It should look something like this:
You can resize all the panels and panes by dragging the borders!
In Blender you can zoom in/out with the mouse wheel and you can rotate the model by pressing the mouse wheel and moving the mouse. You can pan the view by holding the mouse wheel and the SHIFT key and then moving the mouse.
However, the model may be purple/pink for you as the file location is considered to be what was on my PC and not what may be the organization on yours.
If this is the case,
- Right-click the model in the left pane (he'll get an orange border)
- Press tab. The texture window to the left should show the outlined shapes on the UV map.
- With your mouse hovering over the UV map, press A. This will select all the shapes on the UV map.
- Click Image > Open Image to select your file!
Now you should be able to see the NormalNavi in all his green glory.
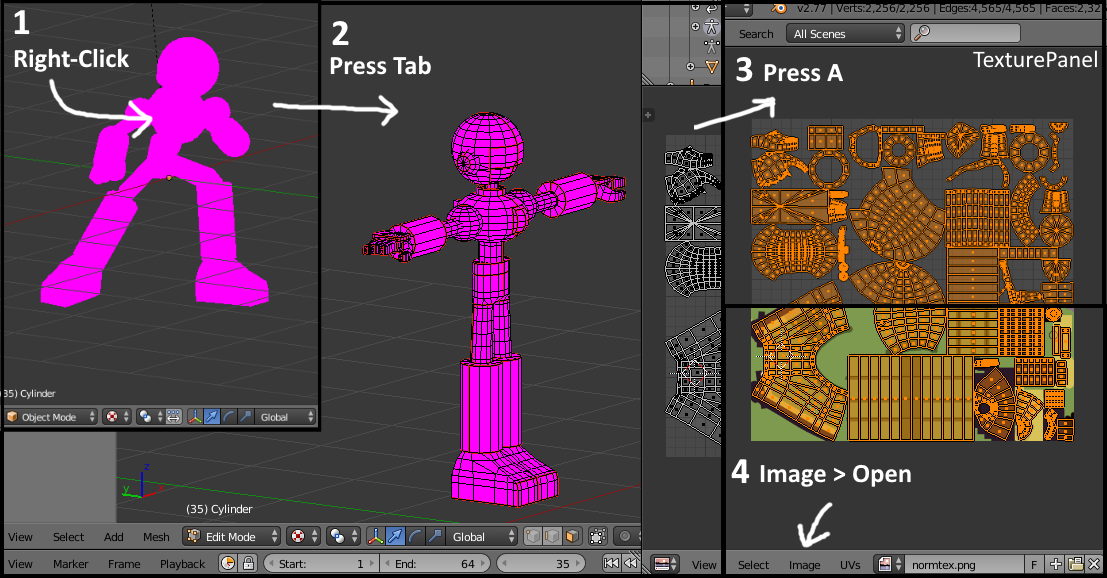
Visual instructions for if your Blender does not show the model's texture
Step Two: Reading the UV Map
Pressing tab while selecting the NormalNavi (orange outline) will swap between object mode and edit mode. In edit mode you can select parts of the NormalNavi (with right click) and they'll show up highlighted on the right pane.

So, looking at that texture pane to the right we can now see what we should edit if we want to change his legs. Let's open up our texture.
Step Three: Opening the Texture (and UV map)
First, open up normtex.png in your favorite image editing tool. Then, add a second layer above this base image. Add normnaviuv.png as that top layer.

It should look something like that on the right at the end. Make sure to navigate back to the bottom layer when actually painting. Those black lines are the outlines of the "UV map". Basically a mapping of how the 3D model unfolds onto a 2D space (reverse papercraft).
Step Four: Editing the Texture
From here on out we can edit whatever we want. Let's change the colors and put them on the model as an example. Just a simple recolor.

You can do this, of course, as many times as you want so you may want to make a small change -> put it to the model -> next change until you're satisfied.
Save your edited texture to normtex.png (the file that Blender considers the texture for NormalNavi).
- In the window with the UV layer, paint the texture layer under the UV layer
- Copy the full texture layer
- In the window/file with just the texture, paste the texture layer and save the file

Ta-da! Char's Custom NormalNavi
Make as many changes as you like! If you want to save it under a different name so you can have different textures. Then you can swap them by doing Image > Open Image as described above.
For speedy updates to the model keep the texture open twice, once with the UV layer and once without (so you can just copy and paste it).
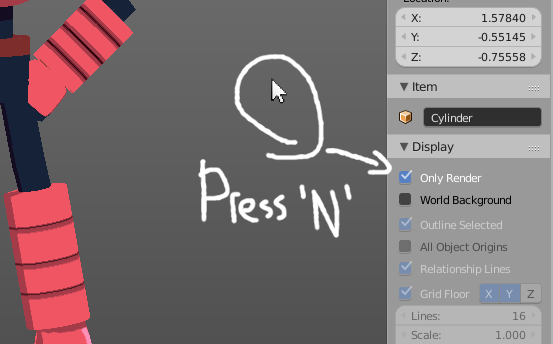
Step Five: Sharing your Masterpiece
So you want to take a screenshot of your fine work, but all the Blender lines and grids are in the way. Here's how to get a clean capture:
- With your mouse hovered over the 3D view of your model, press the N key
- In the new menu, unfold the "> Display" tab and tick "Only Render"
- Press N once again to collapse the menu
I hope this was a clear and informative post and that you had fun making your own NormalNavi. Be sure to show them to me when you get the chance!

Outro
If you'd like more posts like this and on other topics please consider supporting this patreon. It helps me do fun stuff like this! For example a tutorial on how to texture paint like I do or how to pose and animate models!
As always, please let me know what you think either here or any other place. If you need help with any of the steps, try the community discord of MMBN3D: discord.me/mmbn3d
Thanks for reading!