 Home
Home

 Artists
 Search
 Recent
 Random
 Posts
Posts
 DMs
DMs
 Tags
Tags
 Random
 Importer
 Import
 FAQ
FAQ
 Account
 Register
 Favorites
 Login
Login

February Tutorial: Lineart Tips (Patreon)
Content
Sorry this one is a little late oops! I'm gonna go over a few tips and things about doing lineart! I actually really enjoy doing lines (it's one of my favorite parts of doing art) but I know a lot of people really hate it so maybe this will be helpful lol
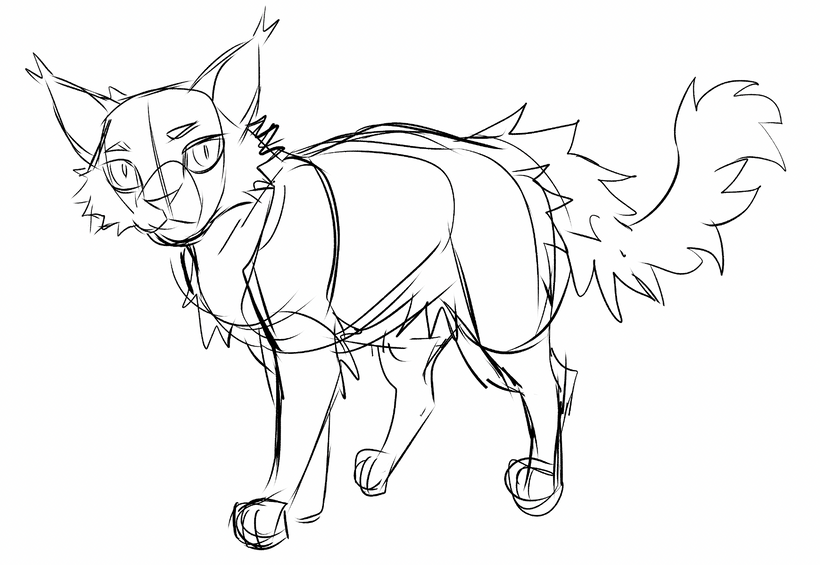
Start with a sketch! This is pretty much what mine always look like. I tend to stay pretty rough with sketches and I get lazy with details, the important thing for me is making sure all the important parts stay in the right places so my anatomy stays sound, and I can refine things later with the lineart.
If you prefer doing a more detailed sketch that's great! In that case I'd recommend doing a more refined sketch on top of a rough sketch, as this helps you not get too hung up on the details right from the beginning and make sure the whole piece (pose, composition, etc) is working before you get too into details. For me, getting more confident with lineart has helped me not rely so much on my sketch to get details right, so you might find as you get more comfortable that you don't need to refine your sketch as much.
This is how I prep my sketch for lineart. I recommend making it a color to help differentiate visually between the lines and sketch (assuming you're lining with black), I like blue but you can use whatever you want.
Turn the opacity down as low as you can stand, I usually go for around 20%. This helps in two ways: it lets you see the lineart without relying too much on the sketch to communicate the shapes (which can help that thing from happening where you turn off the sketch and the lines look terrible, if the sketch is too visible while you're lining your eye gets used to that and makes the lineart look weird by comparison). It also helps you avoid doing lineart on the wrong layer, because if the opacity is low your lines would look gray if you tried drawing on that layer lol

Here's a recording of the lineart I did for this drawing! It's a real-time recording so you can see exactly what I did (you can also watch it on 2x speed if you want to see it faster)
https://www.youtube.com/watch?v=zVVQHRNZeY8
And here are the finished lines:

I'll break down my process a bit:
- I tend to do strokes really fast and redo them if they aren't the way I want (which is a lot lol). I'm used to doing digital art without brush smoothing so this is how I learned how to make my lineart smooth. Obviously smoothing gets the job done too if your program has it, but I also like the control of not having a lot of smoothing on my brush
- Sketchy/rough lineart can work well if that's what you're going for, but the quickest way to do smooth lineart is by using as few strokes as possible for each line/curve. This can take practice! But personally I find it really worth it to get good at doing as long/fluid of strokes as possible since it's also quicker in the long run. I honestly don't have very good tips for getting good at this, just do your best to maintain control and try to focus ahead of your pen on where you want the line to go.
- Supplementing your lines with smaller/sketchy details to build form can help really well! I do a lot of unshaded drawings so it's important that I capture a sense of form with just lines.
- Adding black shading to your lineart can work wonders with giving your lines dimension. To do this be sure to keep your light source in mind, and try to imagine where the darkest places on the form would be. You can add a lot more or less shading than I do, whatever works with your drawing!
Another option is to go over your lines again to create a further sense of dimension! The rule of thumb here is give thicker lines to objects closer to the viewer, and leave those farther away thinner. Thickening the lines at places where shapes meet (such as between tufts of fur) can also work very well. I skip this step a lot, especially for warriors designs because I'm trying to do them fairly quickly, but here's the drawing after I've gone over and emphasized parts of the lineart:

I did this drawing in Clip Studio Paint with the Tapered Pen! This is what I use for basically all of my warrior cat designs. Personally, I like to use hard brushes with a bit of texture, I find them to be a bit more forgiving than a smooth brush while still giving you a crisp look.
After I color, this is what I do to the lines to help them blend better:

Set the lineart layer to the mode Linear Burn (Multiply or any other similar mode also works), and create a new layer clipped to the lineart layer. On the new layer, use white to color over all the detail lines. This will make them "disappear", like this:

Now just adjust the opacity of the new layer!

Aaand I think that's pretty much all the tips I have! You can also experiment with using different lineart colors on Linear Burn, or using different white (or another color) overlays over your lines to get different effects. If you have any questions let me know, as always I'm no expert so take everything with a grain of sand lol but hopefully this was at all helpful!